45 Degree Tile Chamfering Tool: A Must-Have for Precise Tile Edges in 2026
When it comes to achieving professional-quality finishes in tile installation, precision is key. One tool that every DIY enthusiast or professional tiler should have in their toolkit is the 45-degree tile chamfering tool. Designed to create smooth, clean edges on tiles, this tool is essential for those looking to add a polished, high-end look to their tiling projects.
Whether you’re working with ceramic, porcelain, or natural stone tiles, the tile chamfering tool helps you achieve precise, uniform edges that not only look great but also enhance the overall durability and longevity of your tilework. Let’s dive into why the 45-degree tile chamfering tool is essential for your next project and how it can improve the quality of your tiling work.
What is a 45-Degree Tile Chamfering Tool?
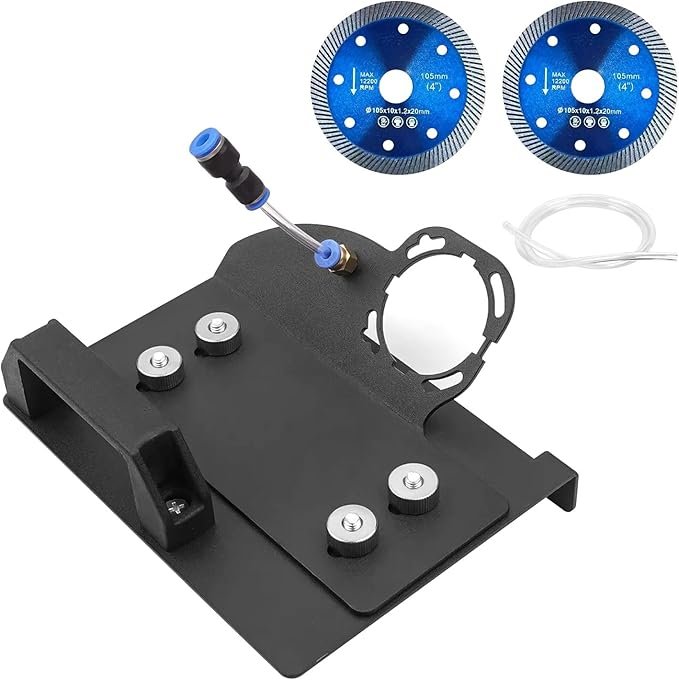
A 45-degree tile chamfering tool is a specialized device used to smooth or bevel the edges of tiles at a 45-degree angle. This chamfered edge creates a polished, professional finish and helps prevent sharp tile edges that can be dangerous or unsightly. The tool typically features a grinding or cutting wheel that allows you to adjust the depth and angle of the bevel, giving you full control over the finish of the tile.
Chamfering not only improves the aesthetic appeal of your tile edges but also serves a practical purpose. By beveling the tile edges, the risk of chipping and breakage is minimized, especially in high-traffic areas where tiles are more likely to experience wear and tear.
Benefits of Using a 45-Degree Tile Chamfering Tool
- Professional Finish
One of the primary advantages of using a tile chamfering tool is the clean, professional edge it produces. Rather than leaving raw, unfinished edges on your tiles, chamfering helps achieve a refined and seamless look. The 45-degree bevel creates an aesthetically pleasing transition between the tile surface and the wall, providing a sleek finish that elevates the overall look of your project. - Prevents Chipping
Tiles, especially ceramic and porcelain, are prone to sharp edges that can easily chip or crack. A chamfered edge helps reduce the risk of damage, as it softens the transition between the tile’s surface and its edges. This is especially important in high-traffic or high-impact areas, such as kitchen backsplashes or bathroom floors. - Enhanced Durability
By eliminating sharp, unprotected edges, chamfering also helps improve the durability of your tiles. Tiles with chamfered edges are less likely to experience wear and tear over time, making them a more long-lasting choice, particularly in areas prone to moisture or heavy use. - Easy to Use
Modern 45-degree tile chamfering tools are designed to be user-friendly, even for those who are new to tiling. With adjustable settings for different tile thicknesses and angles, this tool offers versatility and precision, making it easy to create clean, consistent bevels on every tile. - Versatility
Whether you’re working with small tiles, large format tiles, rectangular tiles, or square tiles, the chamfering tool is adjustable to fit different sizes and thicknesses. It’s also suitable for a wide range of materials, including ceramic, porcelain, marble, granite, and natural stone.
How to Use a 45-Degree Tile Chamfering Tool
Using a 45-degree tile chamfering tool is straightforward, but precision is key for achieving professional results. Here’s a simple guide to using the tool:
- Set Up the Tile: Place your tile securely on a stable surface, such as a workbench or tiling table. If necessary, use tile clamps to hold the tile in place to prevent any movement during the chamfering process.
- Adjust the Tool Settings: Depending on the tool, adjust the angle to 45 degrees and select the appropriate depth for the chamfer. Ensure that the tool is set to the right angle and depth for your tile type and size.
- Start Chamfering: Turn on the tool and gently guide it along the edge of the tile. Move slowly and steadily, ensuring that the tool remains perpendicular to the tile edge to create a clean and even bevel.
- Finish the Edge: Once you’ve chamfered the entire edge, inspect the result to make sure the bevel is even and smooth. If needed, make minor adjustments or use a fine sanding block to polish the edge further.
- Clean the Tile: After chamfering, make sure to wipe down the tile to remove any dust or debris, leaving you with a beautifully finished tile edge ready for installation.
Applications for a 45-Degree Tile Chamfering Tool
- Wall Tile Installations: Whether it’s a bathroom backsplash or kitchen wall, tile chamfering adds a professional touch to wall tile installations. The 45-degree angle gives a clean, soft edge that complements the overall design.
- Floor Tile Installations: For floor tiles, chamfered edges not only enhance aesthetics but also increase durability, particularly in high-traffic areas. Chamfered floor tiles are less likely to show signs of damage over time, maintaining their beauty and functionality for longer.
- Countertops and Vanity Tops: When installing granite or marble countertops, the chamfering tool ensures that the edges of the tiles are smooth and polished, providing a seamless and elegant transition between tiles.
- DIY Projects: For home improvement projects or DIY tiling, a tile chamfering tool is an invaluable addition to your toolkit. Whether you’re installing tile in a small space or performing detailed work around fixtures, the tool helps achieve professional results with ease.
Tips for Using a 45-Degree Tile Chamfering Tool
- Wear Protective Gear: Always wear safety glasses and gloves to protect yourself from flying debris or dust when using a chamfering tool.
- Work Slowly: Take your time when chamfering the edges to ensure precision and avoid mistakes.
- Practice on Scrap Tiles: If you’re new to using the tool, practice on scrap pieces of tile before working on your actual project to get a feel for the tool and settings.
- Keep the Tool Clean: Clean the tool after each use to maintain its effectiveness and longevity.
Popular Brands and Where to Buy
Several brands offer high-quality tile chamfering tools designed for both professionals and DIY enthusiasts. Some popular options include:
- Makita: Known for durable and powerful tools, Makita offers tile chamfering tools that are easy to use and offer high precision.
- Bosch: Bosch’s tile tools are perfect for those seeking advanced features, accuracy, and reliability for professional-grade results.
- DeWalt: DeWalt is a trusted name in the power tool industry and offers chamfering tools suitable for a variety of tiling projects.
- Montolit: Specializing in tile tools, Montolit offers professional chamfering tools that are built to last and deliver excellent results.
- Tavool: Tavool offers affordable options for DIY enthusiasts and homeowners, with user-friendly designs that provide solid performance.
You can purchase 45-degree tile chamfering tools online from retailers such as Amazon, Home Depot, Lowe’s, or specialized tiling tool stores. Additionally, many tool hardware stores carry a variety of tile chamfering tools for different needs and budgets.
Conclusion
The 45-degree tile chamfering tool is an essential tool for anyone working with tiles, whether you’re a professional tiler or a DIY enthusiast. It helps create sleek, polished edges that not only enhance the appearance of your project but also improve the durability and longevity of your tiles. With a variety of options available on the market in 2026, choosing the right chamfering tool for your needs can make a significant difference in the quality of your tile installation work.